Thursday, September 29, 2011

Before and After/ New Look

I have been working really hard the last two weeks on making new curtains for our home and as well as making a few other changes. I'm really excited about the new look (new patterns and colors) of things around here. Since we are just renting the house and can't paint the walls or anything, these projects have been a great way to personalize our space.

I started in the dining room and made new curtains (featured in my last post) and then I covered my dining room chair seats.


Then I moved on to tackle to living room. I made new curtains, new ottoman cover, painted some picture frames turquoise, covered some canvas with fabric, covered some canvas with chalkboard paint, made new pillow covers and make a magazine tray for under the coffee table. I really love the brown, chartreuse, turquoise and hints of yellow and orange!


A closer look at the ottoman, the chalkboard canvas and fabric covered canvas:


In the drawstring bag next to the canvas is chalk and an eraser:)


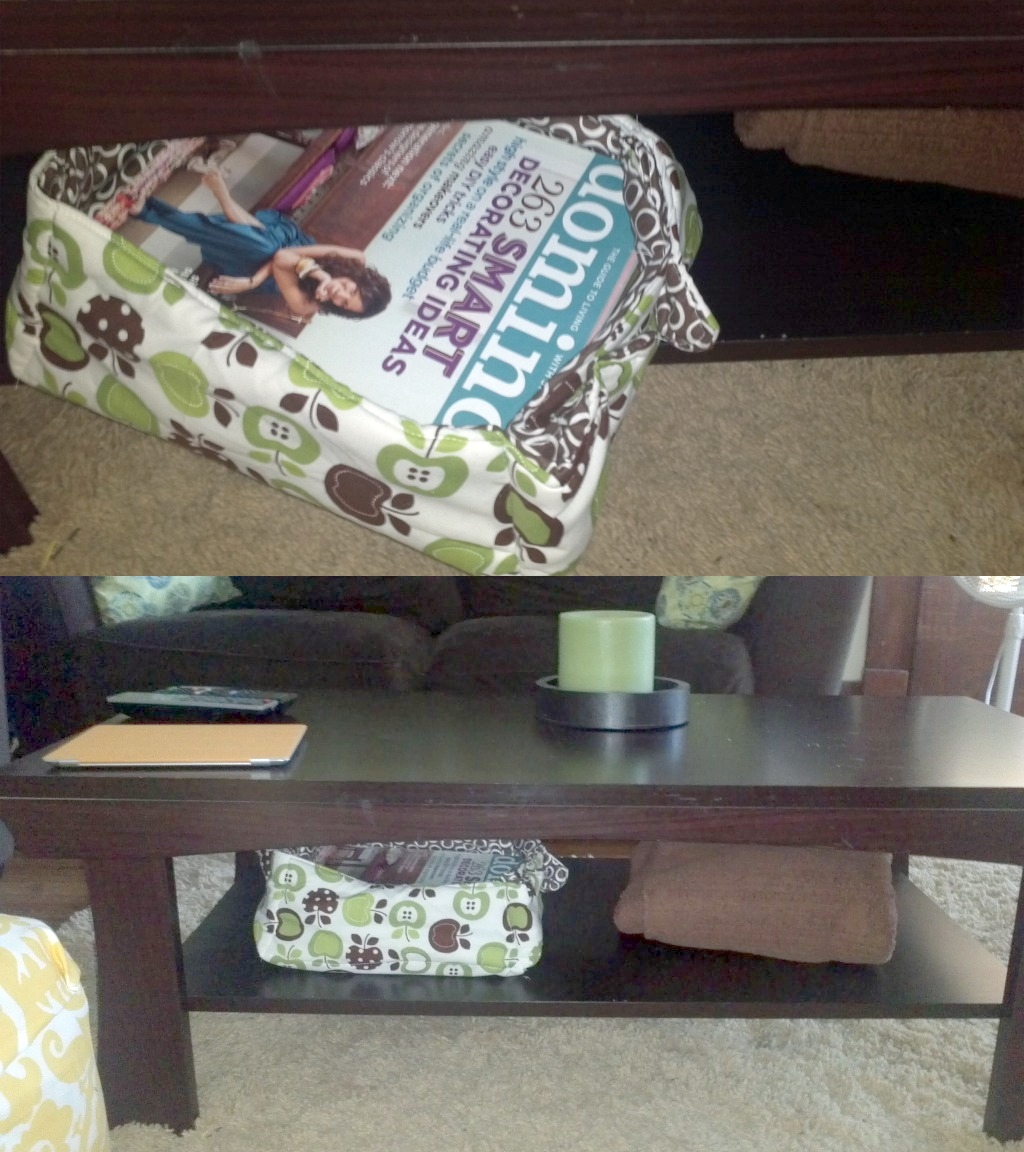
Closer look at the coffee table:


I also made curtains for my son's room.

Curtains for our room.


Curtains and decor for my office.


I am really enjoying the new colors and patterns. The chartreuse zigzag patterned curtains were a bold move for me, and I'm glad I went with it! I got most of my fabric from Etsy.com (moderncloth and sewfresh fabrics) and Fabric.com. I LOVE Premier Prints fabric (which is mostly what I used) and I got really great deals at Fabric.com. I highly recommend these shops! Well that's all that I have been up to, I hope you enjoyed the tour of before and afters and feel inspired to create your own projects!

Tuesday, September 20, 2011

DIY Tie-Up Shades Tutorial

I'm pretty excited about all my little DIY home-ware improvement projects I have going on. This tie-up shade is one of the most recent projects. It's not exactly like most tie up shades because the ties on this shade are directly on either side. I think they look great though and are a fabulous addition to our dining room.
So, this is my first REAL tutorial and I'm pretty stoked about that! I hope the information/instructions are clear and concise enough!

What you will need:
- 1 yard of fabric per curtain
 - 4 yards+ 6in of ribbon per curtain
-Thread and sewing machine
-Scissors


The first thing you will do is lay your 1 yard of fabric fabric flat on a surface and take what will be the top and fold it down 3 or 4 inches (big enough to put a curtain rod through) and pin it.


Next, take what will be the bottom and fold it about an inch or so and pin it.


Then take the sides of the fabric and fold them over about an inch or so as well, but be sure to run 2 strands of your ribbon along inside the fold on each side, leaving a few inches hanging outside the fold at the bottom and pin it.


Now you are going to start sewing. Starting with the top and sew the fold shut and then sew the bottom fold shut.


Then sew the side folds shut but be sure not to sew the the ribbon inside the fold the whole way either. Only sew and attach the ribbon at the top inside the fold.


And then all you have to do is hang it up and adjust it to your liking by tying the strings at the bottom and you're done!

On the left is the curtain tied and scrunched up and on the right is a curtain that is not tied and scrunched. (you will have to ignore my ghetto wooden spoons propping up the windows lol)
This project takes about an hour or so with no interruptions like kids or sewing machine mishaps, not that I would know what that is like ;) so it took me about 2 hours.

Enjoy!

Friday, September 16, 2011

DIY "Mock Re-upholstered" Chair

So, I'm pretty sure I just made up that term - "Mock Re-upholster", but I'm not sure how else to describe my project from this afternoon.

Before I go on about my exciting project let me give you a little back story.

Not only is this a "before" picture, this is a "before" picture of the very first piece of furniture that Matt and I acquired as newlyweds. I say acquired because it was not bought nor given to us. We found this little treasure on the side of the road outside a home with a "take me" sign attached to it. So, take it we did. It was free and in good condition. OLD, but in good condition and had an antique-y/vintage feel to it, so we took it. I have still held on to this thing after 6+ years and have often thought about getting rid of it, but just haven't been able to part ways. For a while now I've been thinking of re-upholstering and painting it to make it more modern. I finally got around to it this afternoon while my 2 y/o did something rare- nap!


The first thing I did was paint the chair white.

I wasn't too concerned with putting a second coat on it because I decided I liked the antique-y /distressed look that one coat gave it.
After painting the chair, I didn't even bother with ripping or tearing off the old upholstery (which if I were doing an actual re-upholstery project I would have done that before messing with paint). Instead, I had JUST ENOUGH of some fabric to COVER the old upholstery. 


I didn't even use any kind of staples or whatever, just LOTS of tucking and hot glue!

 I didn't mess with re-tufting it either, even though I think it would have looked cool!  I didn't know if I would have enough fabric to cover the back, but I did! And I don't think it would have looked so great if I hadn't covered the back too.

I'm super pleased with my chair's makeover. It really looks like I did an an actual re-upholstery project.


I sewed up this snazzy pillow to accent the chair and kind of break up the monotony of the print.


Here is the official "before and after" photo.

This project was a lot of fun and it was a new thing for me. You can now find a DIY tab up top, I will be posting this project along with other projects soon. This one project has inspired me to do a lot more DIY and "before and after" projects! 
Pin It

Wednesday, September 7, 2011

Lined Paper Pattern Potholder

    So, I saw this tutorial on how to make one of these pot holders and HAD to try it! My sewing machine had issues during the making of it and my son interrupted me many times as well, so this is just a prototype. I plan on making plenty more. I think they would make great gifts during the holidays along with your favorite cookie or brownie mix all wrapped up inside the pot holder sleeve kind of like this.


Here is my version of the "Special Message Pot Holder":


  I even added a little loop so I can hang it on a hook. Overall, I am pleased with how it turned out. :)
Pin It