Wednesday, October 26, 2011

Fall Crafts with Elisha!

Last week my 2 y/o son, Elisha and I worked on some super cute fall crafts. We basically just used cutouts of his hand print to make a fall wreath and some cute monsters to put on a Halloween sign to hang on another door at our house. Here is a sneak peek!


Happy Fall!


Pin It

Thursday, October 20, 2011

Pumpkin Craft Tutorials

I was thinking of ways to illuminate our doorway for trick or treat-ers on Halloween, as we don't have an outside light (kind of weird). Although, I don't take my child out and about on Halloween night (he gets to dress up and go to Boo Fest which is a city wide event where children may go to different businesses and get candy and a free book from the library (--my favorite part!) and then he gets to go to a Hallelujah Party at our friend's church, where he gets to play games and get a few treats) my family likes to pass out candy and Christian tracts so that we may share the gospel with our little visitors!

Anyway, I came across some cute ideas, including this one (found on Pinterest):


Here is my version, including a tutorial for how I did it:


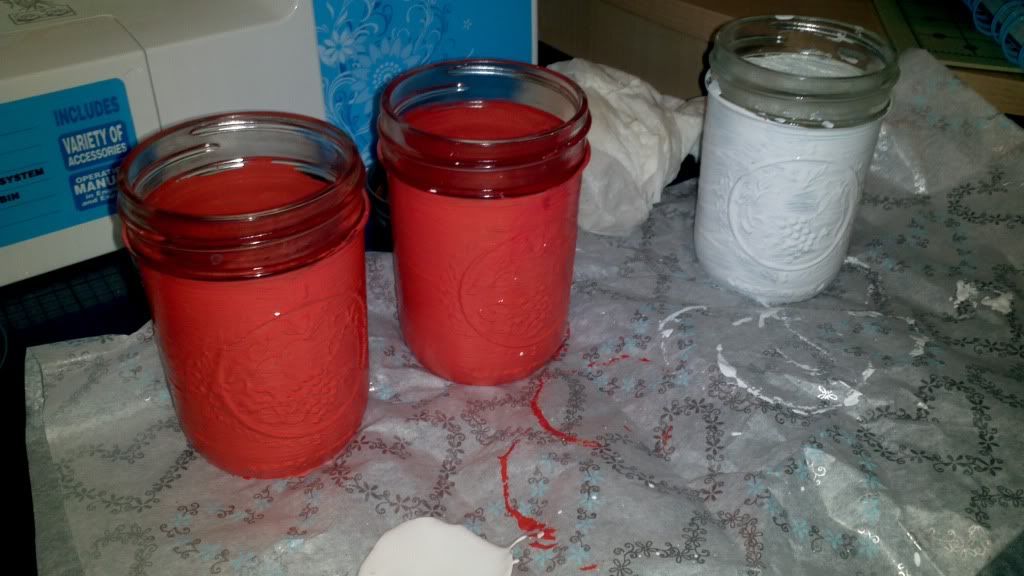
You will need everything you see here:

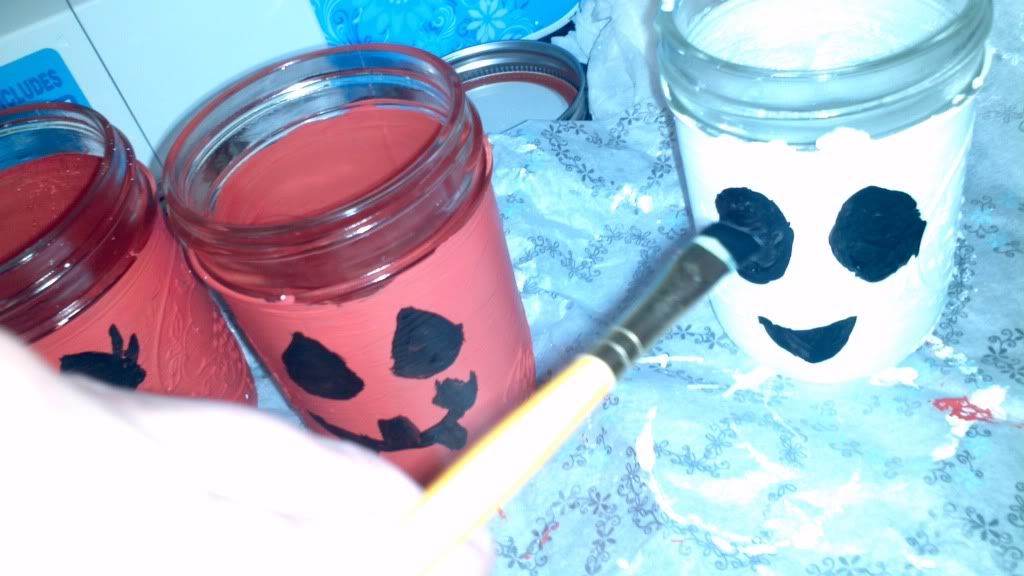
Start by painting your jar the color you desire and let it dry:
Next, paint on your cute scary faces and let that dry:


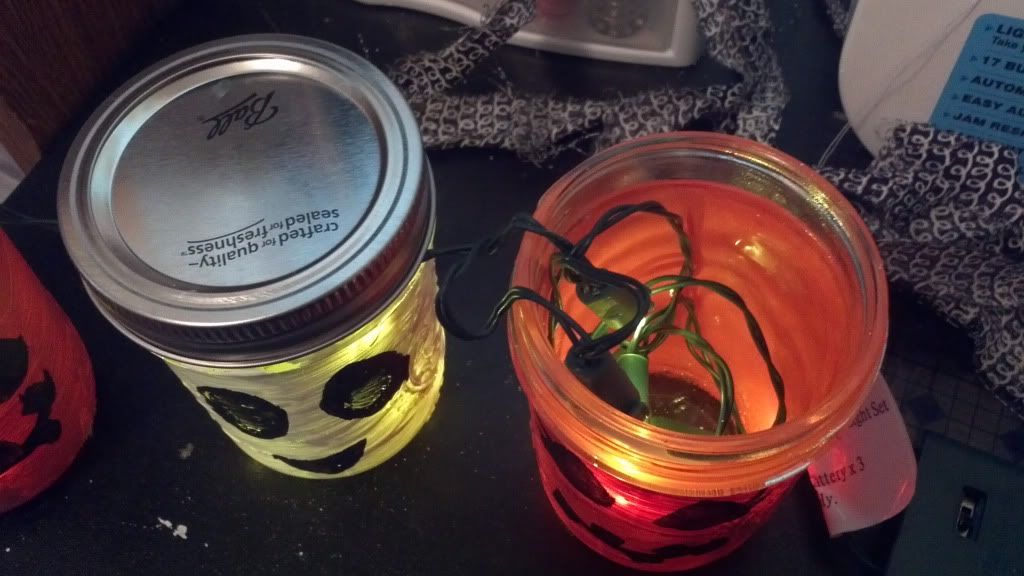
Add a string of battery operated lights or a flameless candle like so:
  
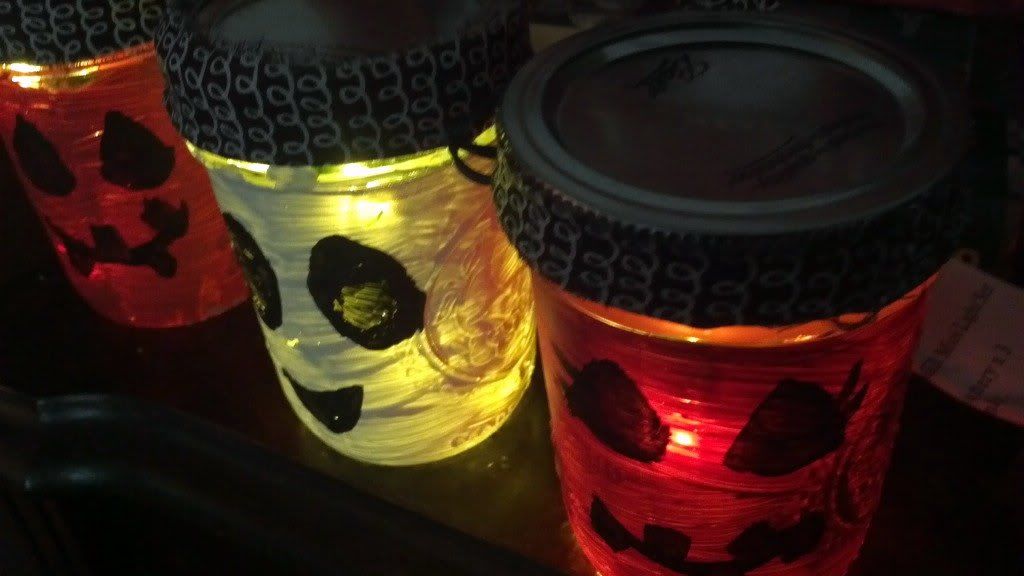
Add some cute fabric strips/ribbon if you like and you're set!
I'm planning on putting this out on my front steps to light up the porch a bit!


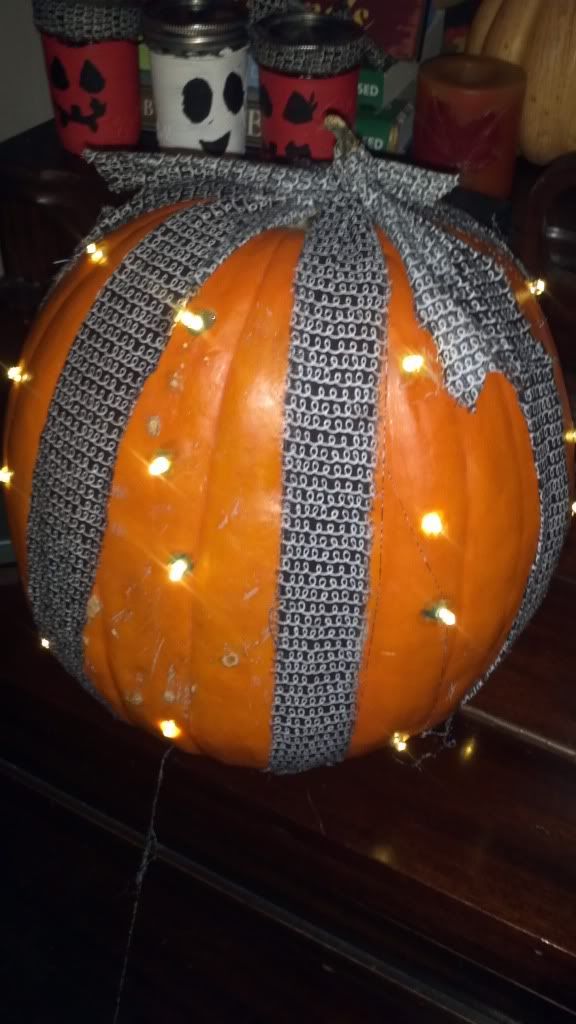
I also found this idea on Pinterest and decided to give it a try as well (I added my own little touches):

This one is mine:

Here's how ya do it:
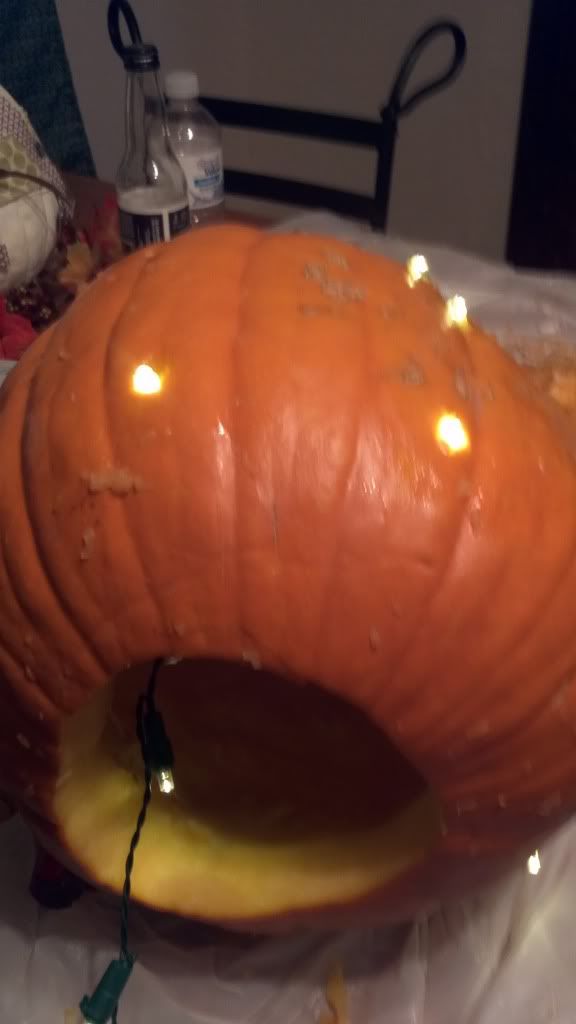
First, gut it out! (I gutted it from the bottom, instead of the top)

Next, poke holes where you want to pull your lights through:
(I used a screw driver, but a drill works too)

Then start pulling your light bulbs through from the inside:
  

Then you can add any special touches if you like, and you're done!


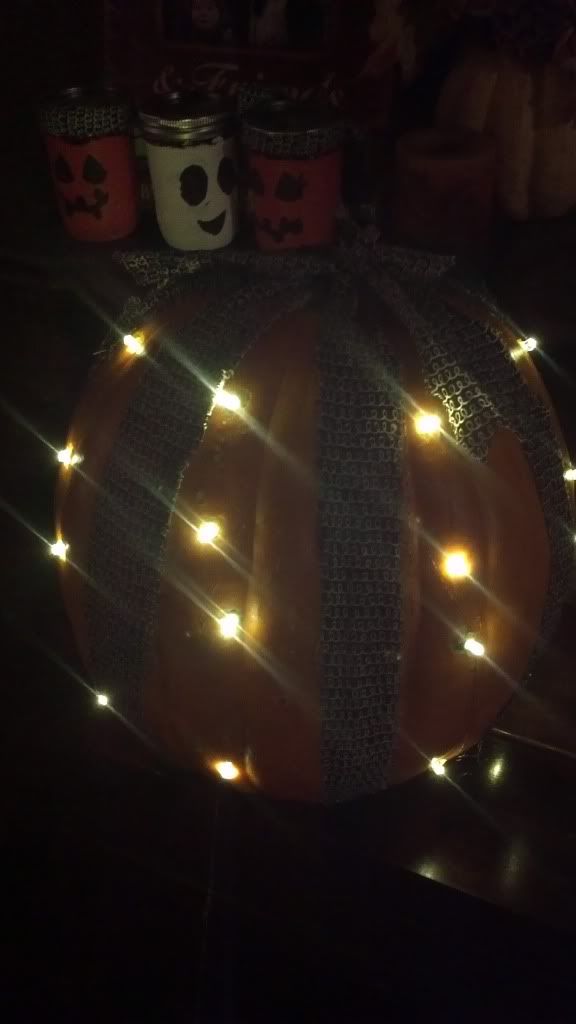
Had to test it out--I like it!

While I was fixing up my pumpkin and gutting it out and such I was reminded of this thing I read one time, it goes like this:

"Being a Christian is like being a pumpkin.
God lifts you up, takes you in, and washes all the dirt off of you.
He opens you up, and scoops out all the yucky stuff--
including the seeds of doubt, hate, greed, etc.
Then He carves you a new smiling face
                     and puts His light inside you to shine for all the world to see"
  

:)-Enjoy!

Pin It

Monday, October 17, 2011

Pumpkin Decorating

Tonight my little family  decorated some pumpkins. It was a lot of fun and my 2 y/o especially enjoyed playing with the paint! I just wanted to share our finished products along with a place to find  some FABULOUS pumpkin decorating ideas (I found them to be very inspiring!).

 Here is my pumpkin. I think it will make a great centerpiece all the way through Thanksgiving if it will last that long.

Here is all of our pumpkins together. The middle is my 2 y/o son's pumpkin. He painted it by himself and then I added the fabric that is wrapped around it and painted his first initial on it. The last one, of course is my hubby's- he's really good at those little cartoon-y illustrations.


Here are some awesome ideas to check out over at My Blessed Life blog. Enjoy! :)
Pin It

Friday, October 14, 2011

Quick and Easy Fettuccine Alfredo (with a few twists)

I really wanted fettuccine Alfredo for lunch today, preferably with some chicken in it. But, I had no chicken thawed out or anything so I decided to make some fettuccine alfredo anyway, but add a little bit of a pasta carbonara twist to it. It turned out way better than my expectations!


Here is the recipe:

 What you will need:
-Your fave fettuccine 
-Olive oil
-1/2 med. chopped onion
-1 egg, whisked
-2tbsp half and half
-Your fave Alfredo Sauce (I used Classico Four Cheese Alfredo)
-Optional* Parmesan, garlic salt or feta cheese

  •  Boil your fave fettuccine until it's done
  • -Get out a skillet and put a little bit of olive oil in it and start to heat it up as your fettuccine starts to look done.
  • Chop up half of an onion and add to skillet.
  • Add fettuccine to skillet and increase heat to med/high.
  • Whisk up one egg and mix in with fettuccine and onion.
  • Add about 2 tbsp of half and half.
  • Continue to cook for about 3 or 4 min. until you see your egg is all cooked.
  • Mix in your choice of Alfredo sauce.
  • *Optional- top with feta cheese, Parmesan cheese or garlic salt. **note- I didn't add any of these and it still tasted great!
Enjoy!

-


Monday, October 3, 2011

Bridal Shower Tea Towel Cake

I made this way cute Tea Towel Cake for my sis's bridal shower this last weekend and she LOVED it! I got a LOT of compliments on it.

I have had a few requests on how to make it since then. So, I am just going to share the tutorial I used to make mine.  I found the tutorial to make mine here: Aly&Ash. I know it says Mother's Day Tea Towel Cake, but it doesn't matter. These tea towel cakes are great for Mother's Day, Bridal Showers or even housewarming gifts. I spent all of maybe $4 on the tea towels and dish clothes, and maybe another $5 or $6 on the utensils to stick in it. I already had some cereal boxes that were about empty and  used scrapbook materials and ribbon that I already had on hand to make it all pretty. So roughly $10.00 to make! Not too shabby and it looks fabulous! Enjoy!
Pin It